Basic Web Development Environment Setup
Table of Contents
Step 1 - Install VSCode / Git / GitHub Desktop
Step 2 - Local Git Configuration
Step 3 - GitHub Repository Creation
Step 5 - GitHub Personal Access Token
Steps
Step 1 - Install VSCode / Git / GitHub Desktop
To install Visual Studio Code, Go to https://code.visualstudio.com/ and click on the download button. Once the download is complete, run the installer and follow the prompts.
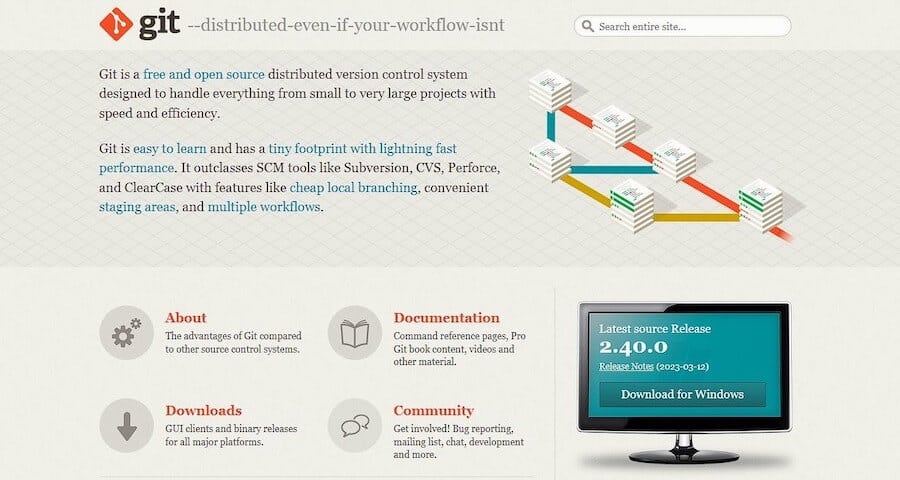
To install Git, Go to https://git-scm.com/downloads and click on the download button. Once the download is complete, run the installer and follow the prompts.
To install GitHub Desktop, Go to https://desktop.github.com/ and click on the download button. Once the download is complete, run the installer and follow the prompts.
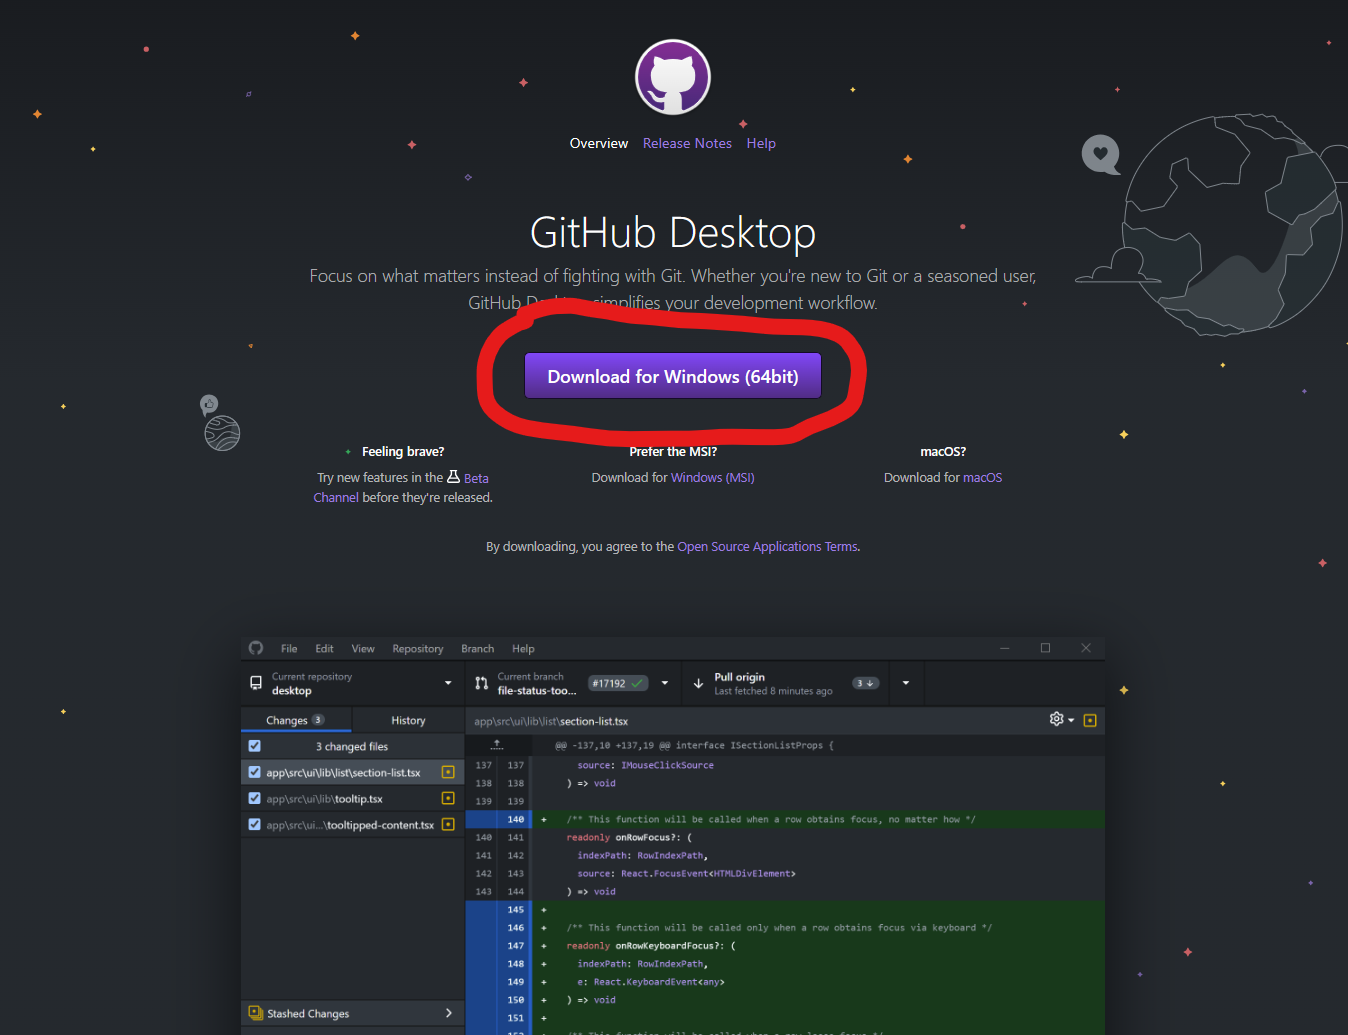
Before using GitHub Desktop, we need to setup our local Git configuration.
Step 2 - Local Git Configuration
To configure Git locally, open a terminal window and run the following commands.
# Check Git Version
git --version

# Set your name and email address
git config --global user.name "Your Name"
git config --global user.email "Your Email"
Step 3 - GitHub Repository Creation
Before we use GitHub Desktop to clone our repository, we need a repository to clone in the first place.
To create a GitHub repository, go to https://github.com and sign in to your GitHub account. Once you are signed in, click on the New button located in your File menu.
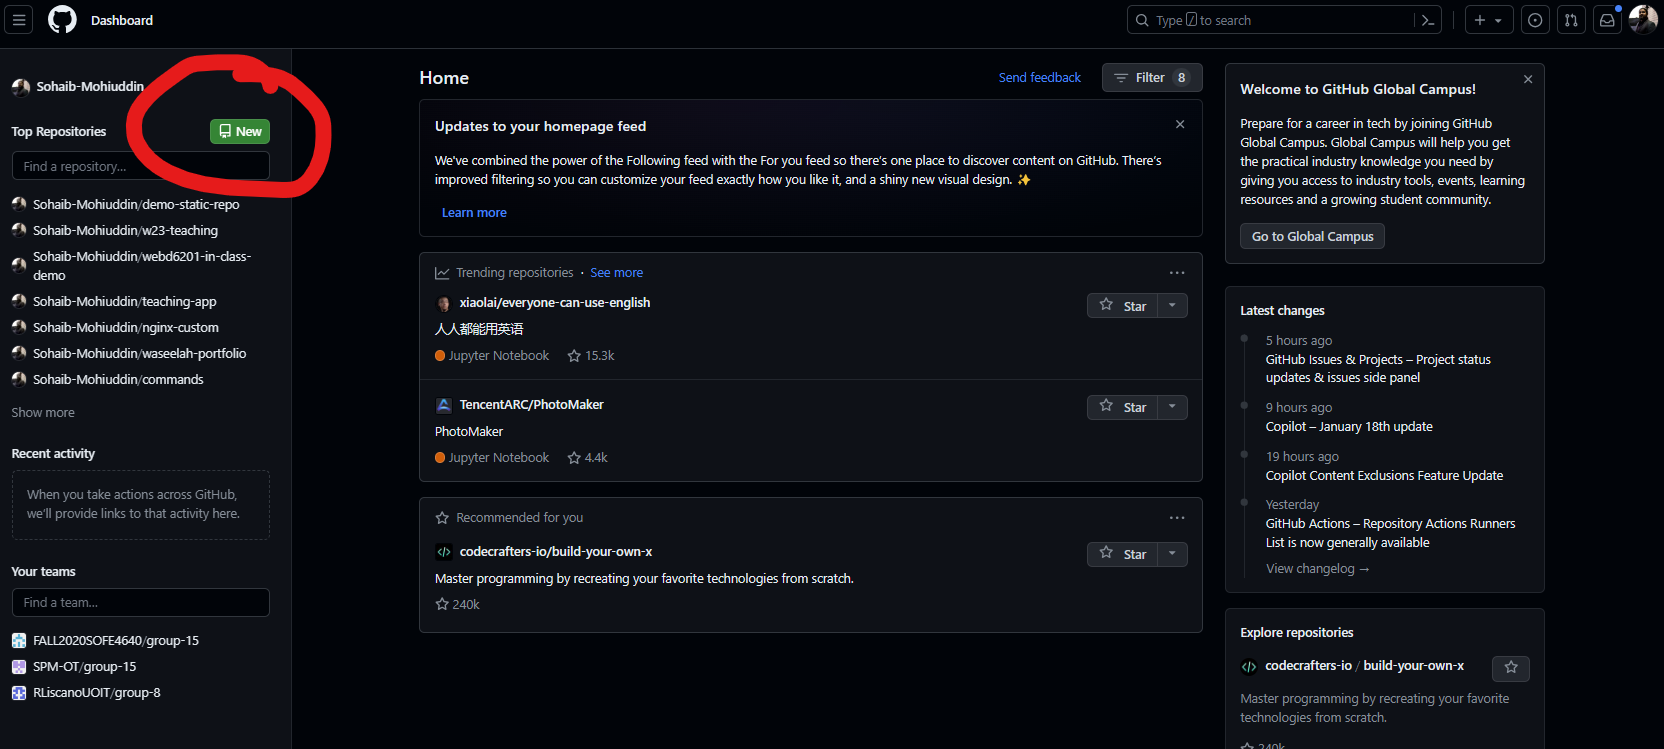
You will then be presented with the repository creation screen. Enter the name of the repository you want to create and click on the Create Repository button.
Example of Input Information for Repository Creation:
- Repository Name:
webdev-app - Description:
Web Development Application - Public or Private:
Public - Initialize this repository with:
None - Add .gitignore:
None - Add a license:
None - Click on the
Create Repositorybutton
Step 4 - GitHub Desktop Usage
To use GitHub Desktop, you will need to sign in with your GitHub account. If you do not have a GitHub account, you can create one for free at https://github.com.

Once you have signed in, you will be presented with the following screen. Click on the Clone Repository button located in your File menu.
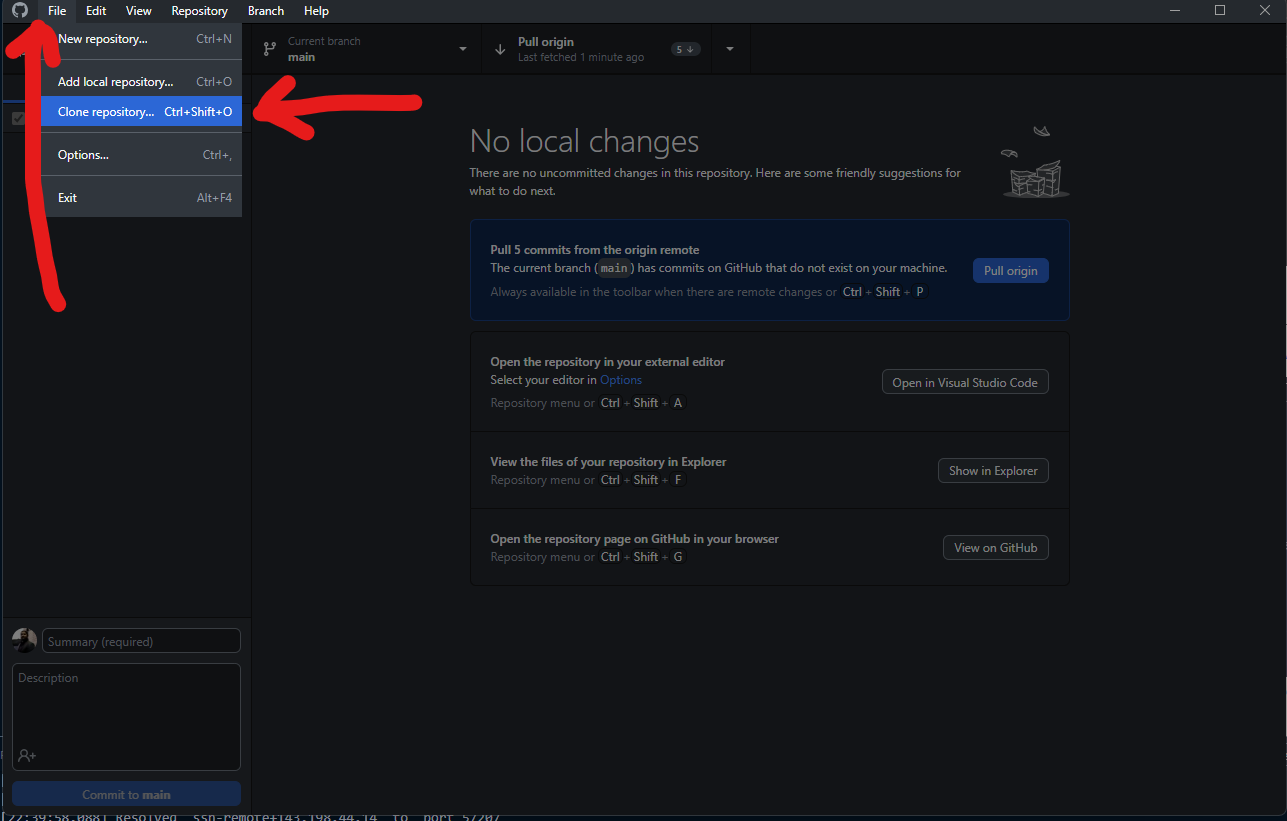
You will then be presented with the following screen. Enter the name of the repository you want to clone and click on the Clone button.
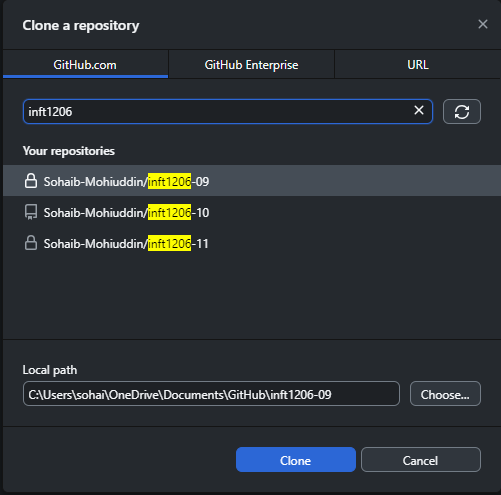
You will then be presented with the following screen. Select the location you want to clone the repository to and click on the Clone button.
You will then be presented with a Pop-Up window on your machine. This window is your GitHub authentication. You will require a Personal Access Token for First-Time Login
Go to Step 4 to create the token to complete this step
Step 5 - GitHub Personal Access Token
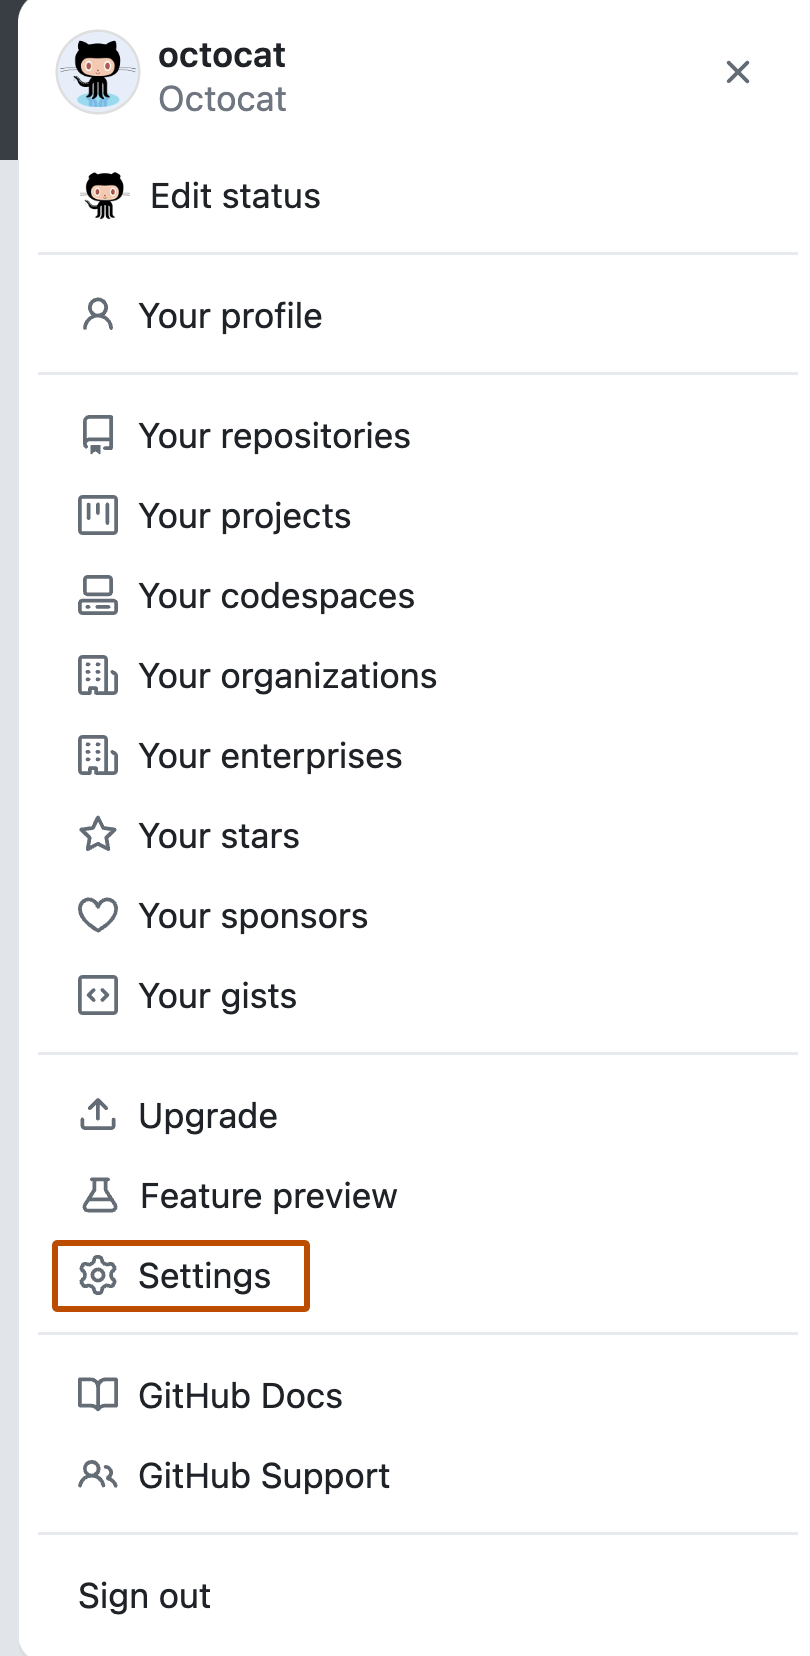
To create a GitHub Personal Access Token, go to https://github.com and sign in to your GitHub account. Once you are signed in, click on your profile picture in the top right corner of the screen and select Settings from the drop down menu.
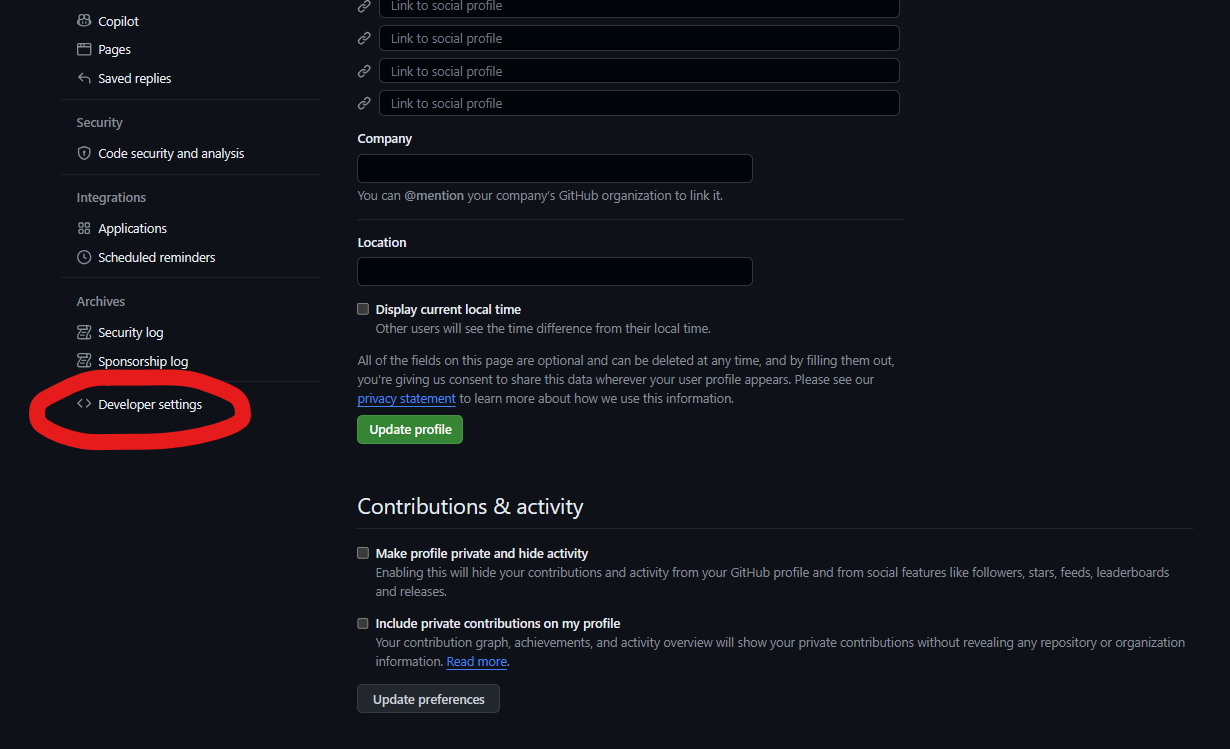
Once you are on the Settings page, click on the Developer Settings link in the left hand menu.
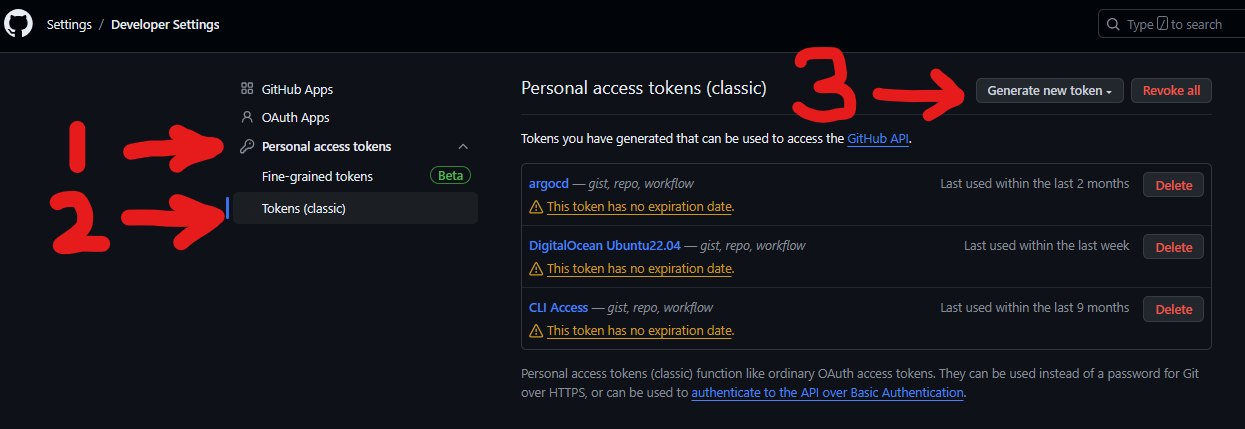
Once you are on the Developer Settings page, click on the Personal Access Tokens link in the left hand menu and select Generate New Token.
Once you are on the Generate New Token page, enter a description for your token and select the scopes you want to grant this token. Once you have selected the scopes you want to grant this token, click on the Generate Token button.
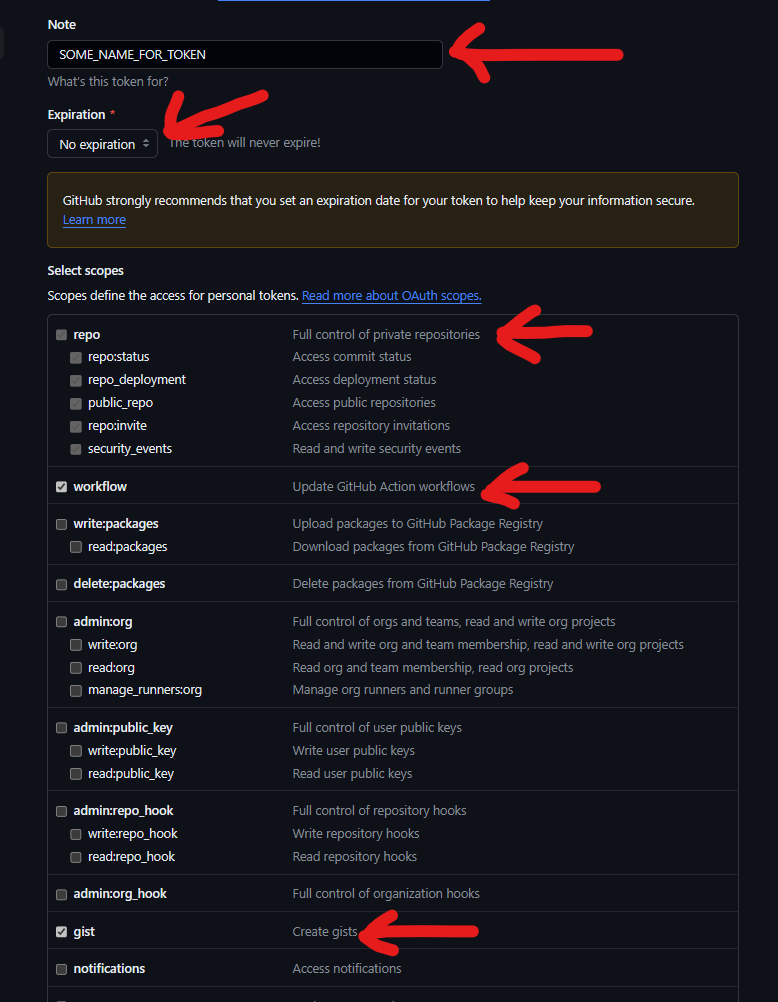
Once you have clicked on the Generate Token button, you will be presented with the following screen. Copy the token and save it in a safe place. You will not be able to see this token again.
Step 6 - Basic Git Commands
To use Git, you will need to open a terminal window. Once you have opened a terminal window, you can run the following commands.
# Check Status of Git Repository
git status

# Add ALL Files to Git Repository for Staging
git add .

# Commit Staged Files to Git Repository
git commit -m "Commit Message"

# If you want to add and commit in one command
git commit -am "Commit Message"

# Push Commits to Remote Repository
git push

# Pull Commits from Remote Repository
git pull

# Clone Remote Repository to Local Machine
git clone <repository-url>

# Create New Branch
git branch <branch-name>

# Switch to Branch
git checkout <branch-name>

# Merge Branch into Master
git merge <branch-name>

# Delete Branch
git branch -d <branch-name>